
Overview and Motivation
This write up is part 2 of 2 in a short series about fine tuning and deploying a large language model. In my previous post we fine tuned the model and learned how to use a transformers pipeline to run predictions for the named entity recognition downstream task.
So now we have a large language model and it works, but what do we do with it? Currently it’s trapped on our machine. What we need to do is create a web application and deploy that so our model can be accessed remotely!
In many data science jobs it’s common that we take a model, toss it over to a software engineer and let them deal with it. But understanding how to deploy your own work makes you a lot more versatile and can also help you understand how your tools are used in the first place. So not only do we get the ability to launch our own tools, we also become an even better team player with this knowledge!
A Quick Note
This writeup will not be covering how to setup an account on aws. That is outside the scope of this tutorial. I’ll be covering what to do once you’re already setup.
Isn’t all of this information out there already?
Yes! All of the necessary information for this task can be found straight from the AWS Documentation. The issue here is I believe the documentation is overly cumbersome at times and I want a reference that makes it all a bit less overwhelming. I’m not the only one who thought this as well. Gastón Barbero wrote a guide I’ll be borrowing from heavily. That guide can be found here and I highly recommend it as a reference. My guide will be slightly different and expand upon some of the parts I personally needed some extra help on. In particular, I’ll also be showing how to connect to a Sagemaker endpoint via Postman.
Structure of our AWS Deployment
Before we get started it’s best we understand how everything will be organized. We’ll be leveraging 3 different Amazon services for this task so it’s important we understand the why behind everything we’ll be doing before we dive in.
To do this, I created a diagram to hopefully help showcase how this will all fit together.
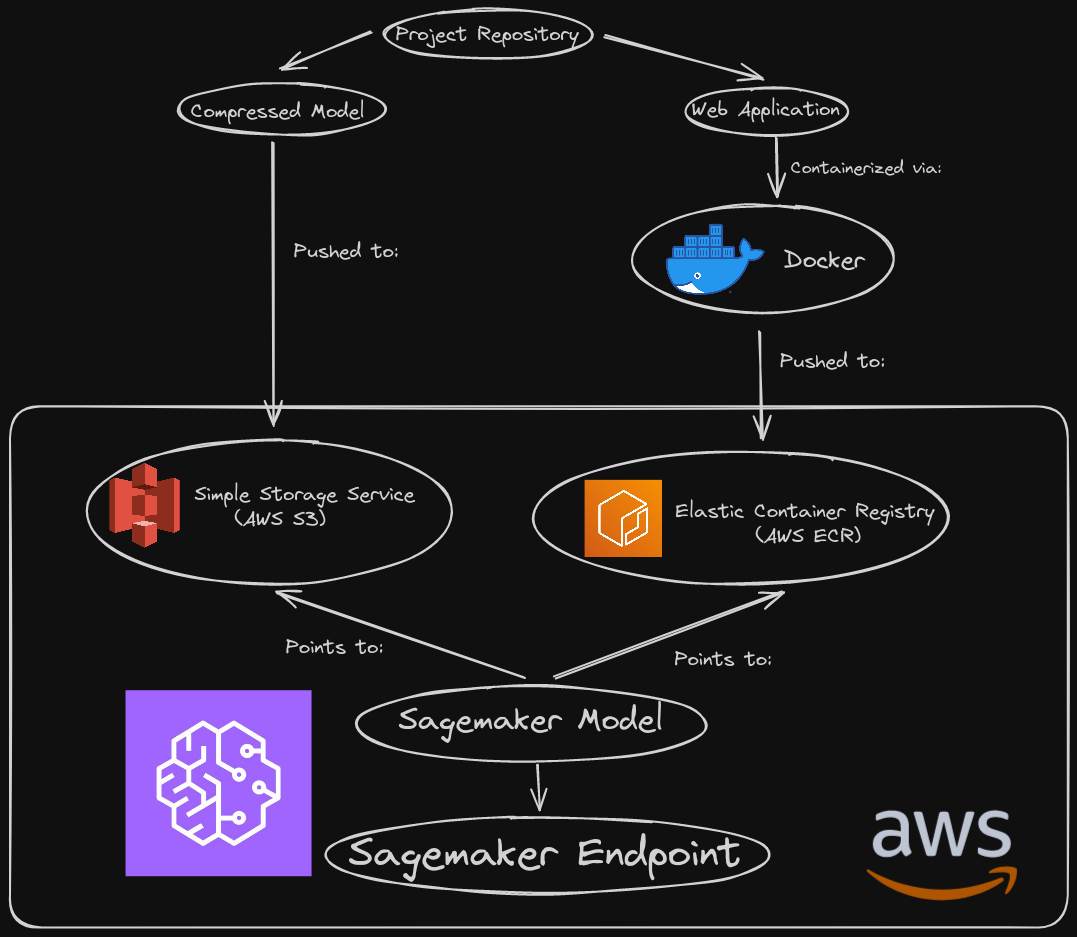
To briefly summarize, we’ll be compressing the model we want to go with and hosting it on AWS S3. Our web application will live elsewhere, as a containerized docker image living on AWS ECR. This took me a while to wrap my head around at first, but it’ll make more sense when we see how Sagemaker wants to setup a model on its end. Anyway, we use Sagemaker to link these two things together as a model and then host it via an endpoint!
Bit awkward at first, but once you wrap your head around what Sagemaker wants it’s not too bad!
First, let’s get our model living on S3.
The Model
Compressing the model
Note that this section assumes you’ve already got a model. I’ll be using a pytorch based Transformer fine tuned from distilbert. Refer back to my previous post if you’re lost.
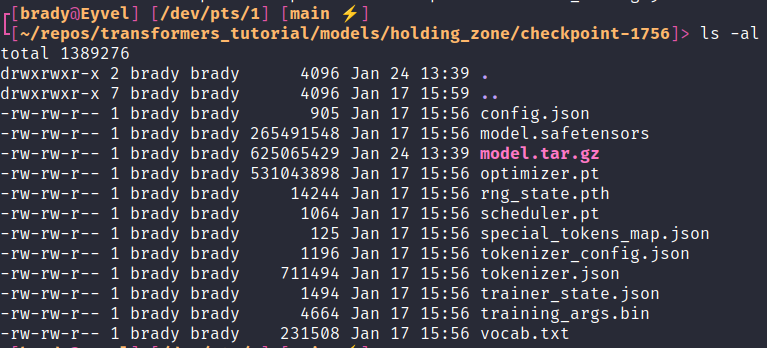
So, last time I decided I’d be going forward with the checkpoint 1756 model so we’ll be compressing that.
|
|
To explain what the tar command does:
taris a compression command in bash.zcompresses the archive using gzip, which I believe is required for S3.cstands for create, so it tells tar to create a new archive.vstands for verbose. Shows more details during archival processfstands for the filename of the new archive. You follow f with the filename, which in this case is model.tar.gz.*tells it to use everything in the current directory.
Also, for reference, here is how my model directory looks.
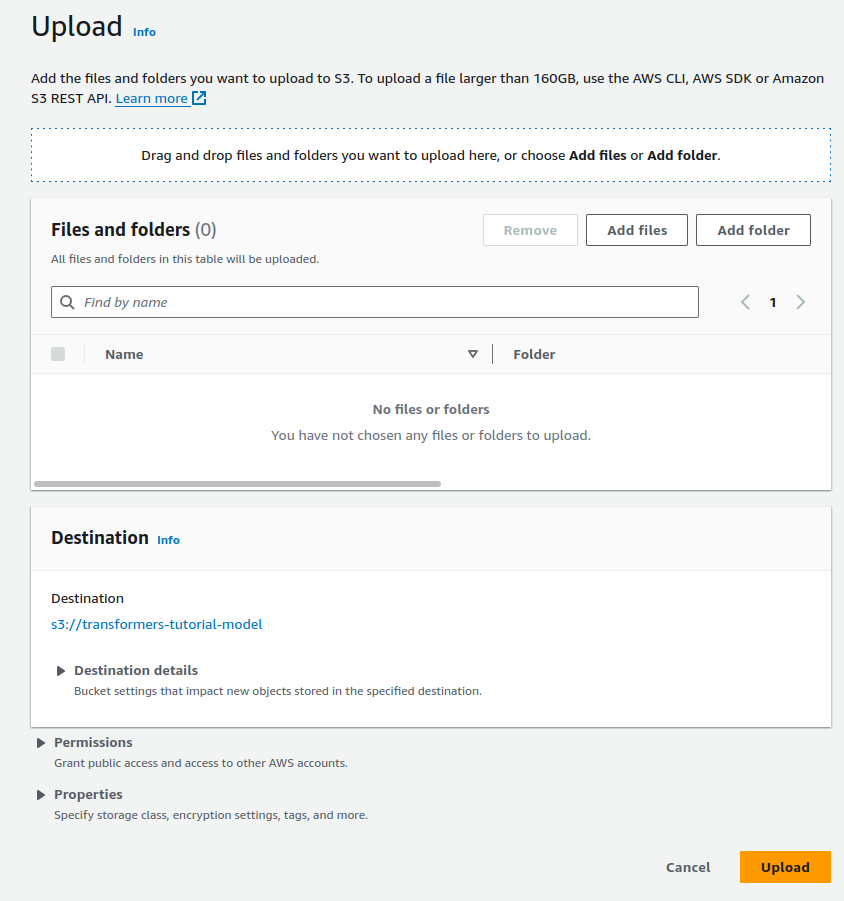
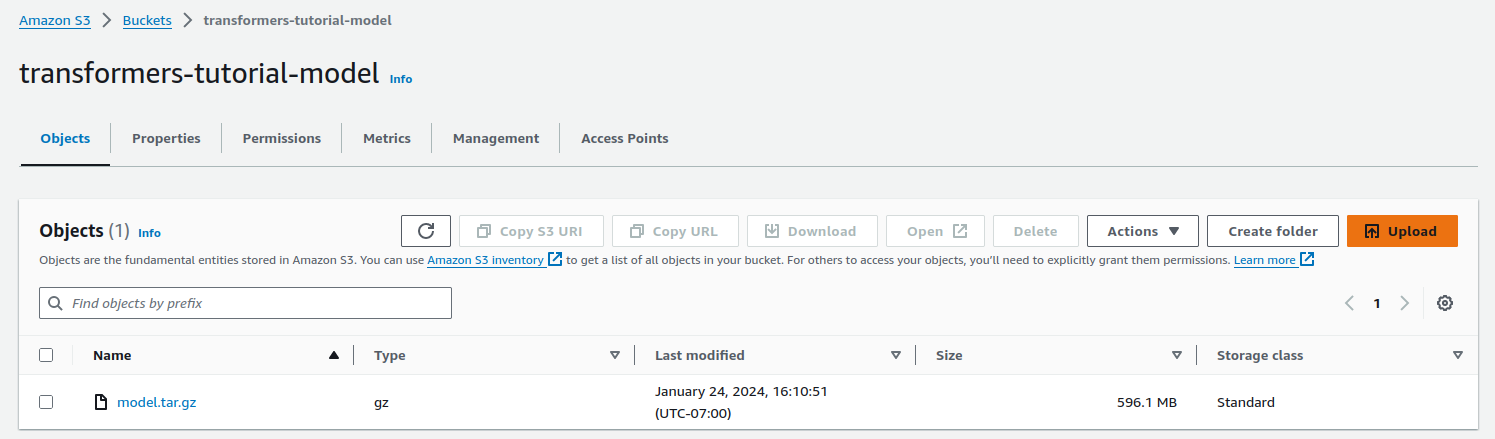
Move Model to S3
You have a couple options here. You can use either use the UI on S3 itself or the command line. I’ll show both methods because why not.
This is as simple as making a bucket for the model and then uploading the archive.
Here are some screenshots for reference.
If you opt to use the command line instead, once you’re logged in it’s as simple as
|
|
And that’s it! Now onto the bulk of the work.
The Web Application
So now that the model is up we need to create an application that can actually use it. This is where I got lost in the weeds when I first learned this. I had made many web applications before, but the docs here got a bit dense (for me).
Essentially we need to organize our web application such that the sagemaker inference toolkit is satisfied. Sagemaker will do a ton of stuff automatically, so our job is to make sure it can access everything in a way it expects. This is where Gastón’s guide really saved me, as Amazons recommendation is a little… much.
Here is their example. AWS Docs, known for their brevity and low skill floor.
|
|
For someone with a bit more experience I’m sure this is perfectly reasonable to parse. For me though? We can do better. It’s actually comical how much more simple we can make this. Better? Almost certainly not. Easier to understand? I think so.
My Repository Structure
Let me show you how my repository is organized. Note that this only includes stuff that’ll be relevant to the web application. My notebooks and models directories are absent from here for instance.
|
|
First gonna discuss src/inference.py and then app.py. The modules directory just contains any helper functions I may need, it isn’t necessary.
inference.py
This file is where we’ll define two functions, load_model() and predict(). They can be as simple or as ridiculous as you wish.
Let me show a basic skeleton of what you’ll want.
|
|
Ahhh, that’s more like it! Now, of course this is just a rough skeleton. You’ll need to add some more stuff depending on your needs but this is the bare minimum. I’d highly recommend some logging in particular to help with the debugging process on the cloud. In particular I recommend timing the different steps to help you recognize bottlenecks on the cloud. I only didn’t include this stuff here to keep this snippet as to-the-point as possible.
I’m pretty sure (source: trust me) that these function names ARE important. But otherwise you can do your thing. For example, we actually need to tweak the predict function so that it handles a little quirk.
Quick Tangent: Stupid transformers pipe bug
Pipe, as we covered last time, returns a bunch of information related to each prediction. One of those is a confidence score that’s a float. Small issue, for some reason it’s a float 32 which isn’t json serializable. So, uh, need to fix that.
|
|
|
|
Okay cool, sick. Moving on.
app.py
This one is also quite simple. We need this script to do a few things.
- Set up the app.
- Load the model
- Set up our two routes.
/ping- Sagemaker just needs this to be extremely basic. I return “pong”.
/invocations- This handles taking in the request, processing it and returning the final output.
Here’s how mine looks for this basic tutorial.
|
|
And that’s all you need there really. Even that schema validation isn’t necessary. Add any extra bells and whistles where you see appropriate. Note that you’ll want to setup some functionality for local testing of the app. Way faster to troubleshoot locally than on the cloud. Trust me. Fight all temptation to cowboy code.
Dockerfile
Alright, let me just show you my Dockerfile and then I’ll break it down.
|
|
Some notes:
- Sagemaker specifies the necessary work directory, so we set that first.
- I have torch set as a dev dependency and exclude it from our requirements so we can install the cpu version for our container instead.
- I install the
multi-model-serveras it’s actually a requirement for the inference toolkit. - I utilize a very simple
.dockerignorefile so I can just useCOPY . .while excluding unneeded directories. - I use
ENTRYPOINTas it’s what Sagemaker wants and within it I provide the command to setup all of our gunicorn stuff.
Move Application to ECR
First we need to setup a repository for our image. You’ll want to log into the aws console online, go to elastic container registry and create a repository. On the user interface you’ll see a URI, we’ll need that.
From here we move to our command line and run a bunch of commands.
|
|
And that’s it! Assuming everything worked we’re now fully on AWS from here.
AWS Sagemaker
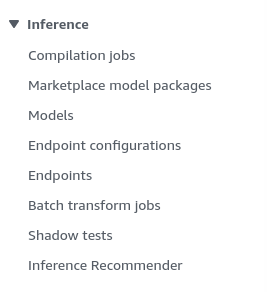
Sagemaker is a lot to take in if you’ve never been on it. It is full of functionality that we will thankfully not be using! If you look at the sidebar in Sagemaker, we’ll be living entirely in the Inference section.
Role Permissions (AWS IAM)
Before we do this you’ll want to move over to Identity and Access Management (IAM) and create a role that has access to both Sagemaker and S3. To keep it simple, you can simply provide the permissions AmazonS3FullAccess and AmazonSageMakerFullAccess and you’ll be good to go. Though, take note that in an actual organization your permissions may be a lot more strict. I called my role data-scientist-full-access.
Sagemaker Models
Go on over to models and click create_model and go through the process. You’re going to provide the location information for your app and model from ECR and S3 respectively. They should have a button to copy straight from those respective services.
Here’s a screenshot for reference.
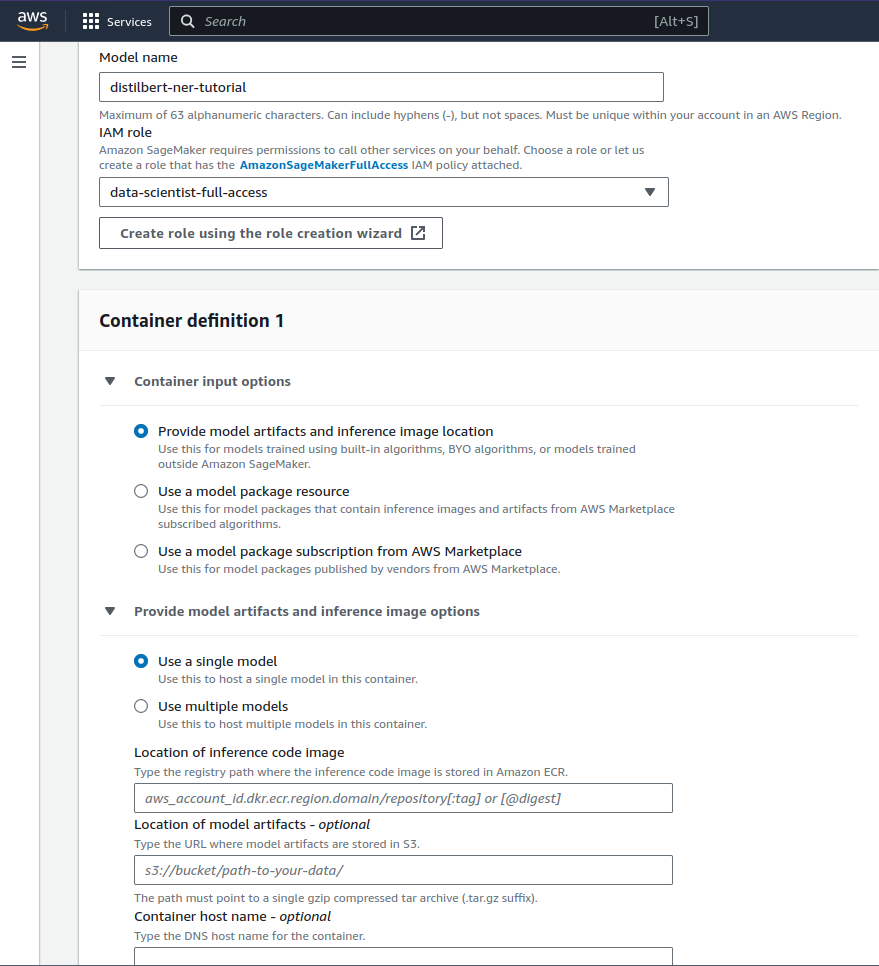
From here, simply click “create model” and you’re good to go.
Create Endpoint
Going back to models, you can click on your new model and see that you can create a endpoint. Do so. Provide a name and select “create a new endpoint configuration”. Here we’ll select serverless. Essentially this is a low cost endpoint that only spins up when it’s under use. So you don’t incur as much cost if it’s infrequently accessed and idling. For some reading on serverless inference, here ya go.
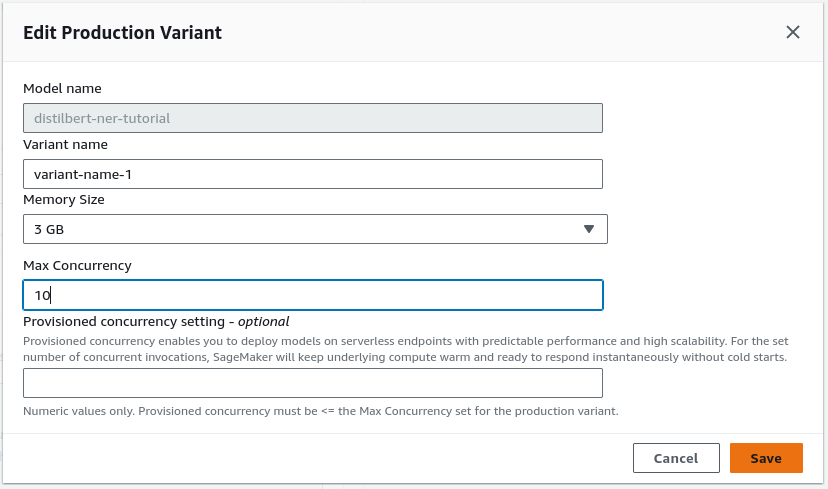
Next we’re going to select “create production variant” and select our model. After creating the variant, you’ll see that you can edit it. We’ll need to do so. You can change the name, memory size and max concurrency.
Memory Size will be dependent on how large of requests you’ll be taking in and price you’re willing to pay and Max Concurrency is capped at 10 for serverless endpoints.
Anyway, from there create the endpoint. It’ll take a while to spin up but assuming everything went well it should be in service!
Here’s what the endpoint will look like once it’s created and running.
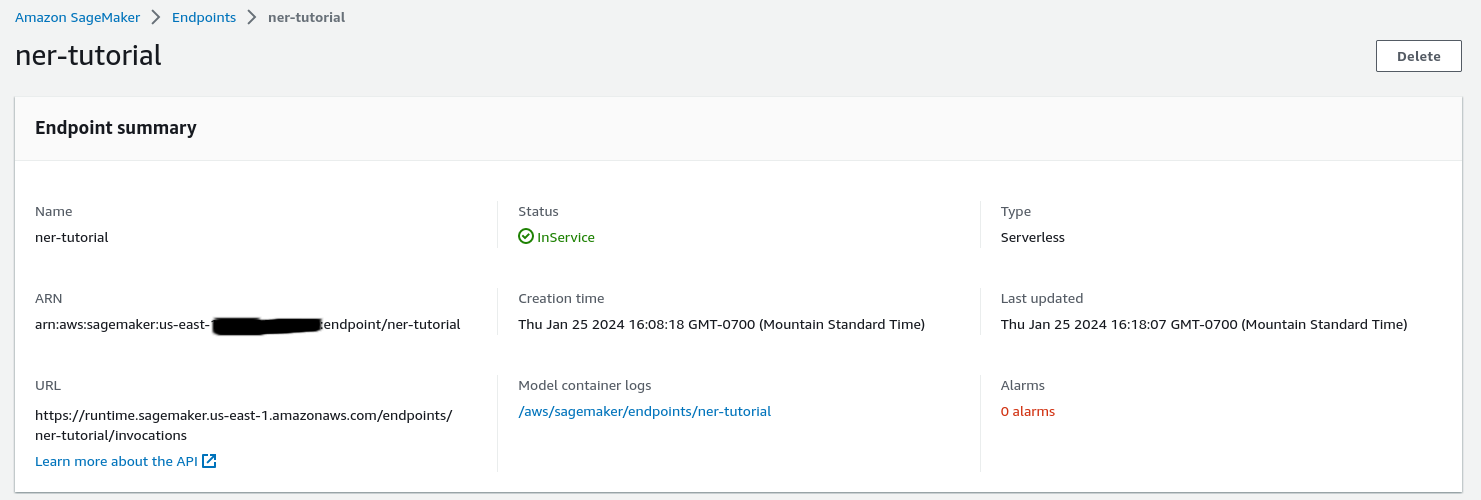
Note the model container logs, you’ll want to check these frequently as you use the endpoint. If your endpoint breaks at all or is performing strangely, the logs will contain what you need to know (if you wrote good logs).
Okay, so the endpoint is up. Let’s access it!
Sending Requests via Postman
If you’ve never used Postman before it’s a fantastic platform for testing APIs! We can send requests through it and make sure they work as anticipated.
We’ll need to do a few quick things to wrap this up. First, setup an environment to hold our access tokens. Second, Set up the authentication headers and lastly send out a request!
Environment Setup
On the left sidebar we can setup a new global environment. Here you’ll include both of your AWS access keys that you can reuse as variables. This is recommended so you aren’t just pasting your secret keys all over the place.
Here’s an example.

Request Setup
Now we can use those variables we setup. In the top right of your window you should see an environment drop drown menu. Select the environment that contains your access keys.

Next, on the top bar create a new request. Remember those endpoint details from when we built the endpoint? There’s a URL in that window, you’ll be pasting that into the request URL.
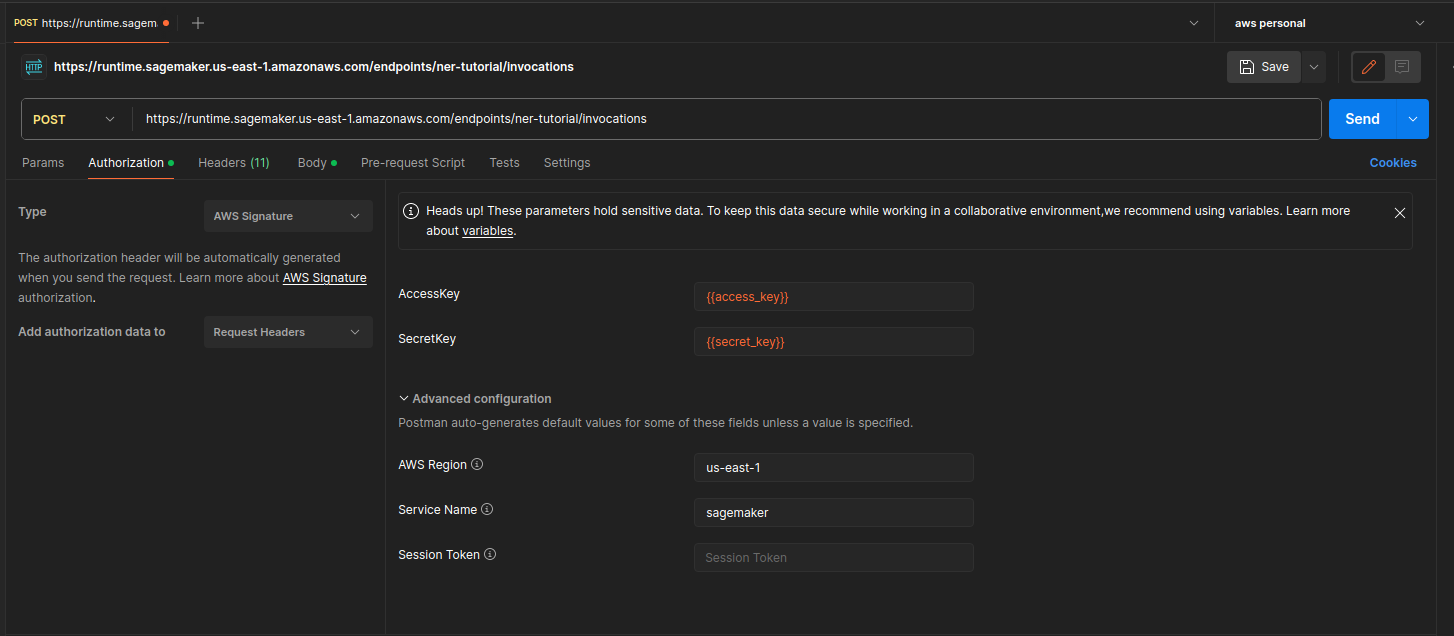
Now click on Authorization. Here we’ll set Type to AWS Signature and paste our key variables. Also go into Advanced configuration and set your AWS region and service.
Here’s how it’ll look when you’re done.
Send a Request
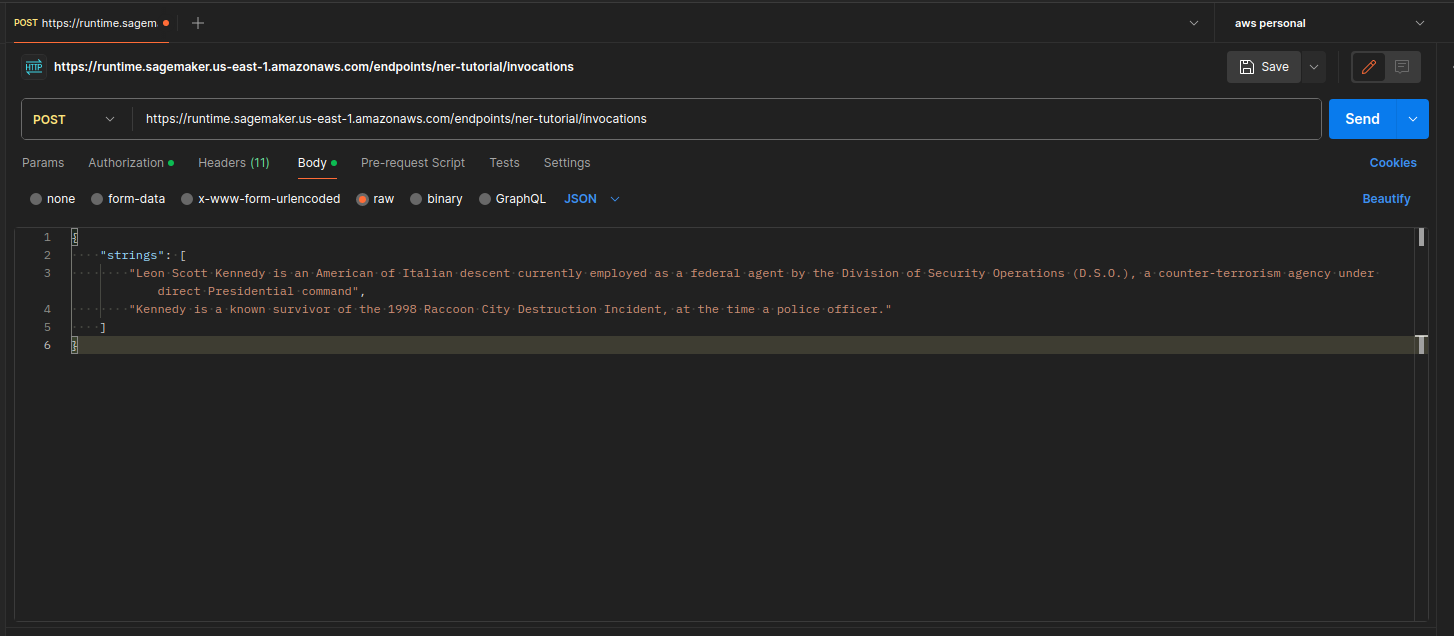
Lastly we’ll go to body and this is where the request lies. If you want to paste raw json into here you can and what I’ll do for a demo. You can also send in entire files using the binary option.
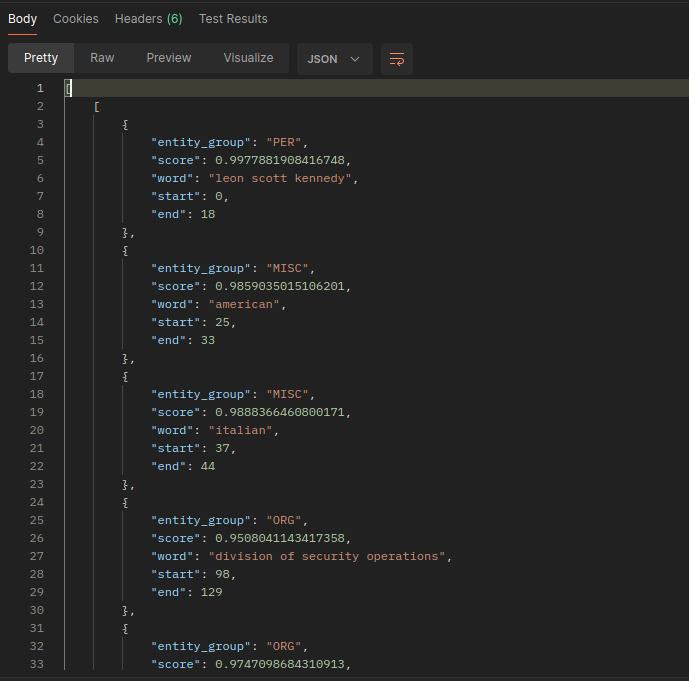
Alright, let’s see how this works with my endpoint! We’ll use some text from the Resident Evil Wiki for fun.
Conclusion
And that’s that! Hopefully this helps demystify the process a bit. I know there’s a lot of room for improvement here but you gotta start somewhere. From here there is a lot we could do. Setting up training via the cloud, maybe using github actions so you can trigger training whenever the training dataset is updated, all sorts of stuff. AWS is so vast; there’s always more to learn and I’ve definitely only just gotten started.